Pages

Thursday, September 6, 2012

How to Evaluate What CMS to Use


Content Management Systems (CMS) have evolved into more than just publishing content, but managing your workflow as well. CMS’s nowadays allow you to easily conceive, edit, index, and publish content, while giving designers and developers more flexibility in customizing their look and functionality. Although there are many that require advanced skills to operate successfully, this article is going to cover a select few that offer a balance between design, code, and end-user usability.
How to Evaluate What CMS to Use
This article will help you make an informed decision on what CMS is right for you.

Evaluating Content Management Systems

Evaluating content management systems can be an overwhelming task, not because it’s rocket science, but simply because there are tons of them to choose from. However, with a structured approach to your evaluation, things can be much easier and less intimidating. Let’s talk about the things you should look at when deciding what CMS to use; here are eight characteristics that a good CMS should have.

1. Intuitiveness: easy to understand and use

Your CMS should have a GUI (Graphical User Interface) that’s easy on the eyes, doesn’t have overly complicated options, and offers simplicity in its administration interface. A good interface means that tasks pertaining to creating and managing your content will be quicker, saving you a lot of time and increasing your productivity.
You should also look at it from an end user’s perspective: if you’re building a content management system for a client who’s not "technology-savvy" and you choose a solution that requires a Ph. D. in computer science, it’s less likely that they’ll be able to use the system (thus, defeating the whole purpose of a CMS, which is to empower its users).

2. Flexibility and Ease of Customization

Flexibility and Ease of Customization
When taking into consideration a content management system, make sure that you’re not obligated to use their design templates. A large quantity of CMS solutions allows you to customize your own design without major restrictions. If your CMS forces you to choose a fixed and unalterable design template, then you’re stripped of creative license and your website will look like everyone else’s.
CMS’s that offer customizations on templates are Expression Engine, WordPress, and Joomla just to name a few; these content management systems boast and promote their ability to be easily modified.

3. Extensibility via Plugins and Modules

Extensibility via Plugins and Modules
A good CMS will allow you incorporate helpful site features into your site by letting you extend the default configuration with plugins.
Plugins/extensions/modules (their terminology varies between different platforms) make a difference in terms of enhancing your site’s ability to provide your site users with useful options for interfacing with your site.
Look for a CMS with a powerful Application Programming Interface (API) in case you need to write your own extensions. Make sure that the CMS you’re considering already has a huge list of plugins. Though you might not need plugins right away, it’s important that this is available to you, later down the road.

4. No Need for Programming Knowledge

If you’re more "design-oriented" than anything else, make sure you select a CMS where you won’t need to have extensive programming abilities to publish and maintain your site.
There is a wide selection of CMS’s that have WYSIWYG editors, letting you edit content without the need for code. Having to edit text through HTML markup can be time consuming and takes you away from other aspects of your managing and building your site.
Complex sites, however, can require a CMS that will let you type in some code, edit files with extensions such as .php, .css, .html, and make changes without that need for a third-party source code editor.

5. Optimized for Performance and Speed

Taking into consideration the speed your pages load on the browser, and how fast your site can make a connection to a server, is vital. Choosing a CMS that is bulky will drive away visitors rather then bring them in. By visiting examples of live sites, you’ll be able to gauge somewhat how fast pages load.
Keep in mind that you can increase the load time of your site by choosing a good host, and adding plugins that cache/compress/minify feeds, CSS, JS and also caches your database objects. A case study on this subject can be found here.
A simple and free tool that you can use to evaluate page response times of your CMS candidates is YSlow. Install it and head on over to demo sites of your CMS’s to see how well it’s front-end performs.

6. Security

Security
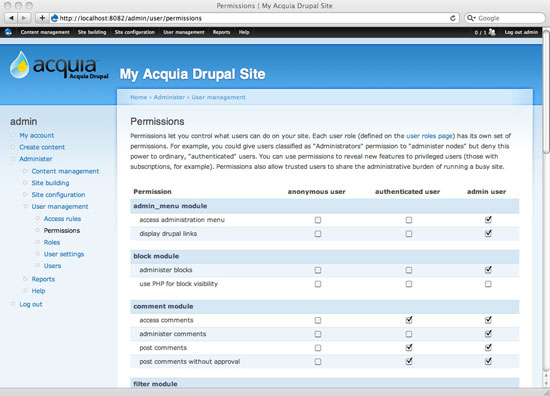
Adequate security for your site is very important and must be in place in order to protect your content. There are CMS’s that allow you to install specific plugins and edit files/permissions in order to increase security levels. Make sure you choose a management system that offers modules to protect the integrity of your site. You can also protect your site by selecting a CMS that allows you to easily assign a different username and password to each user. This will let you view and control what each user has access to.
7. Documentation and Community Support
Nothing’s more frustrating than trying to figure out how to do something, and not have references online that you can take advantage of. One way to ensure that you won’t be running into this problem is by reading through the documentation of your candidate CMS’s. Also, a quick Google search will tell you how popular and well-documented a content management system is.
The availability (or lack thereof) of support from users of the system can be a deal maker or deal breaker. When users are active and proud of being part of the community, you not only have access to individuals that are more familiar with the system, but also, you can be assured that the project will be developed continually. Nothing’s worse than investing your resources and effort on a dead (or soon to be dead) project.

8. Emphasis on Web Standards and Best Practices

Content Management Systems developed under web standards guidelines and best practices will ensure that you won’t get burned later down the road. When applications are designed with best practices in mind, you can be assured ultimate cross-browser compatibility, lean-and-mean code, and ease of maintenance.
Look for content management systems that promote the use of web standards, and those that put it at the forefront of their development and design philosophy.

Some Key Content Management Systems to Consider

Now that you know the key characteristics of a good content management system, let’s take a look at a handful of major CMS’s that excel in most, if not all, of those areas.

ExpressionEngine

ExpressionEngine
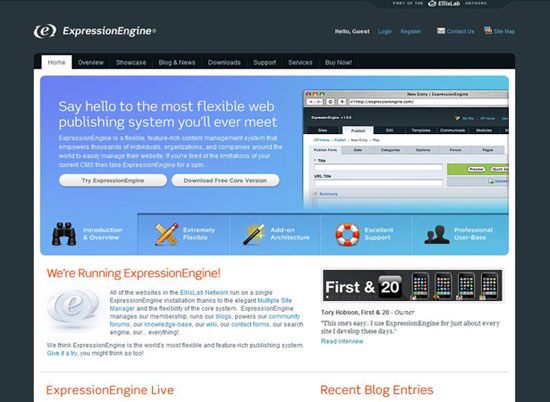
ExpressionEngine (EE) is a flexible CMS for any scope of project. Within a few minutes, you’ll understand how to easily begin creating content. EE’s templating system lets you quickly see instant changes live. EE also has a multi-layered caching system to try and minimize the database usage. In addition, EE lets you embed and run PHP directly within its templates, very similar to WordPress.
ExpressionEngine has various features such as allowing you to have multiple sites with just one installation of their software. Just as we spoke in the above section dealing with connections and load times, EE has a unique template caching, query caching and tag caching keep the site running at a pretty quick pace by storing database queries in memory to reduce database connections when generating web pages.
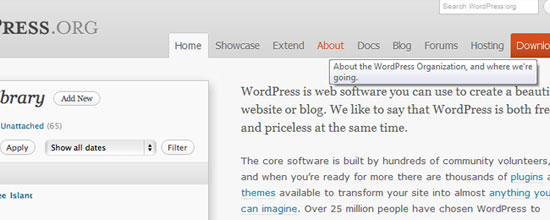
WordPress

WordPress
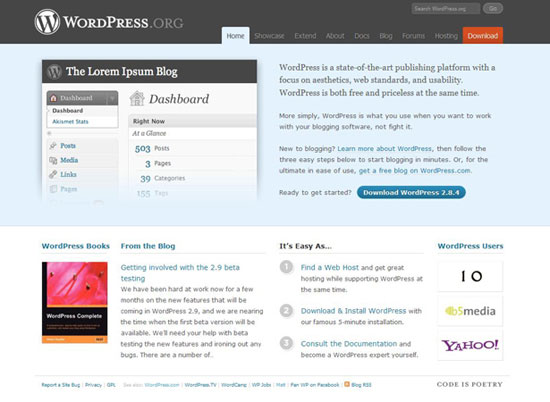
WordPress is one of the most popular publishing platforms currently available in the market, and it’s known for being an excellent blogging platform. WordPress is free and open source, and it can be downloaded and installed as many times as you want.
WordPress installations are very quick and easy. It only takes a few minutes for your admin panel to be operational. If coding is not your strong suit, then no worries, WordPress offers its users a WYSIWYG editor (called Visual Editor).

Business Catalyst/Goodbary

Business Catalyst/Goodbary
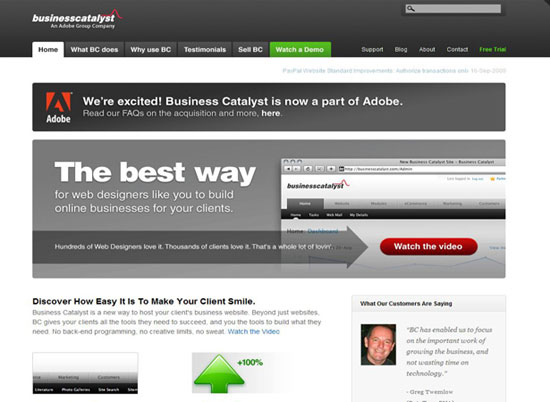
Business Catalyst/Goodbary (owned by Adobe) is a powerful ecommerce CMS for developers. This content publishing platform has an array of useful features such as email marketing and in-depth site analytics. Business Catalyst gives you an easy way for your business to gain an online presence in no time. GB allows you to easily keep track of a customer’s actions, build and manage a customer database of any size, and sell your products and services online. Business Catalyst integrates well with a lot of popular payment systems such as PayPal, Google Checkout and pre-integrated gateways.

Joomla!

Joomla!
Joomla! is an advanced CMS with excellent function and content management. The installation process is pretty quick and easy. Joomla! is a complete CMS allowing you to build simple to advanced sites. Joomla also has super support for access control protocols like LDAP and OpenID, and can interface with popular and open API’s such asGoogle APIs.
With Joomla!, you’ll have more then 3,500 extensions at your disposal along with the support of an entire community. With a simple extension, you can add almost any needed functionality to your site.
One downside to Joomla! is that their heavy-artillery list of extensions often require you to purchase them. Hopefully, in the future, they will make their plugins free in order to aid users on a tight budget.
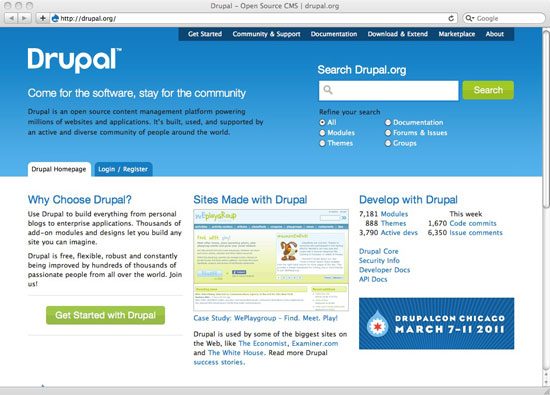
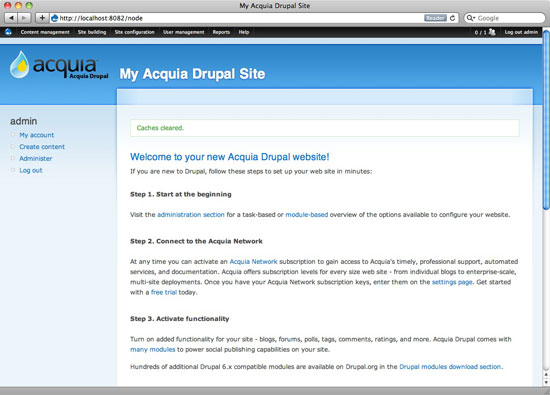
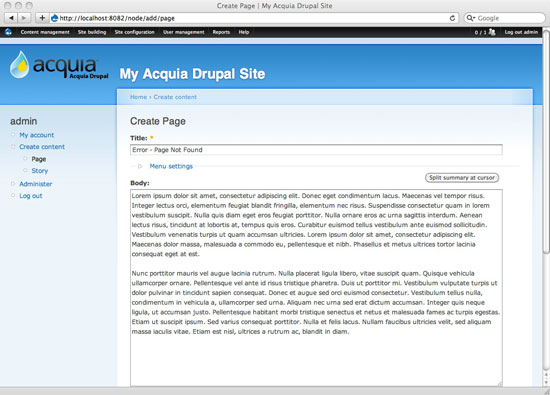
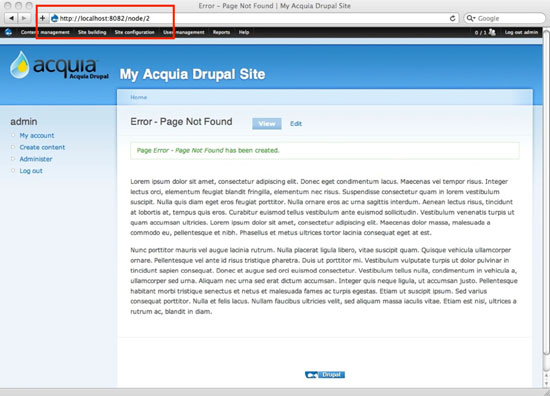
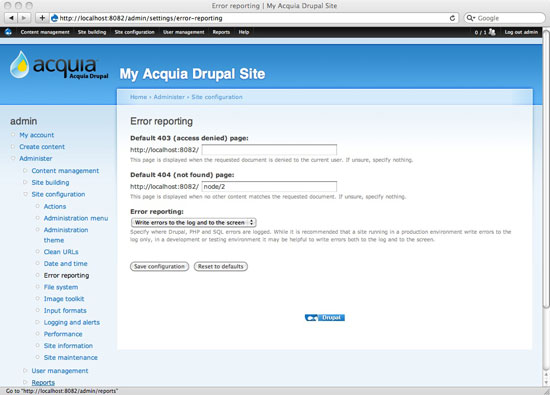
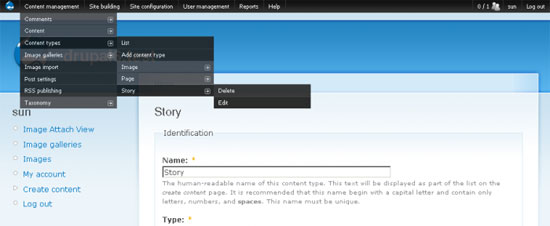
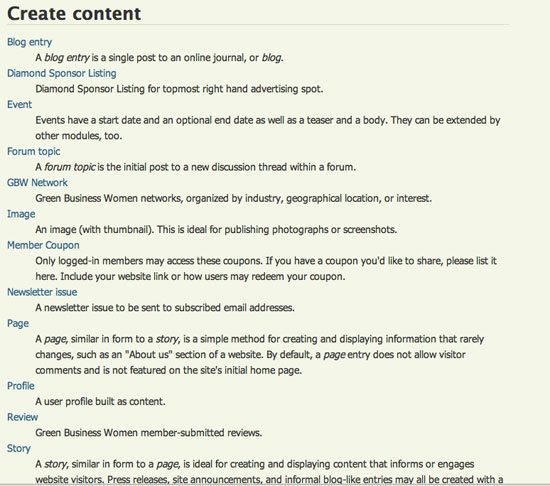
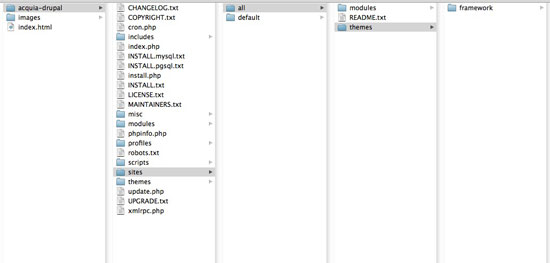
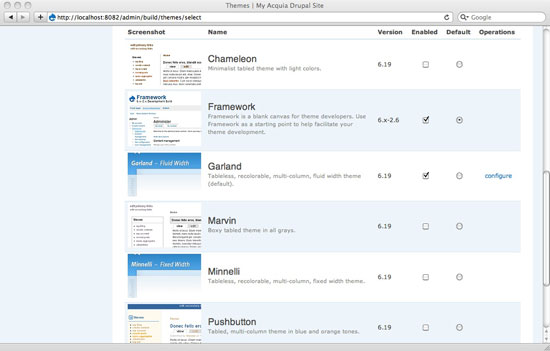
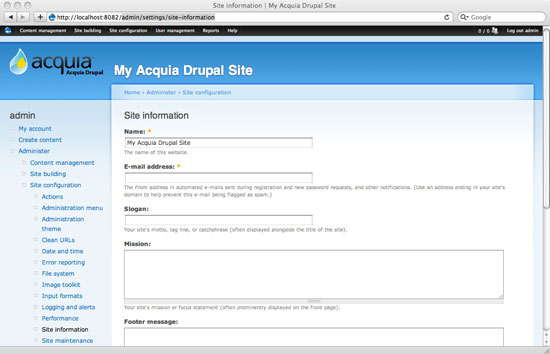
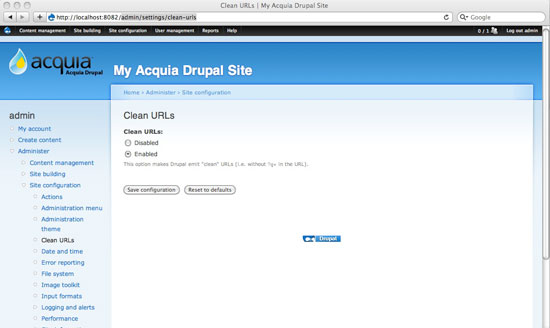
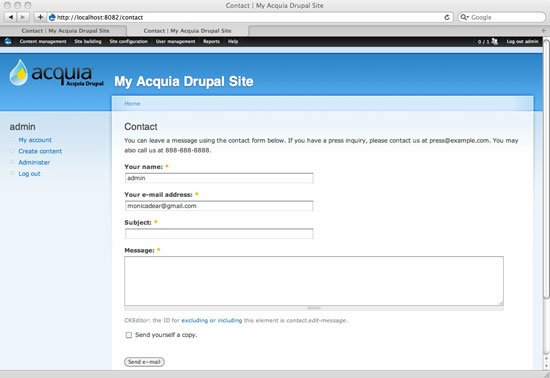
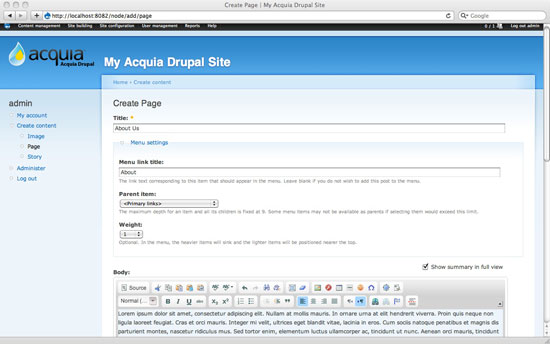
Drupal

Drupal
Drupal, a great open source CMS supported by a very active community, lets users publish content through any time with very little restrictions. Once the installation is finalized, you will discover features such as forums, user blogs, OpenID sign-ons, profiles and more. This CMS was written in PHP/MySQL for ease of customization and has one of the highest-regarded API’s in the open source content management system field.

Cushy CMS

Cushy CMS
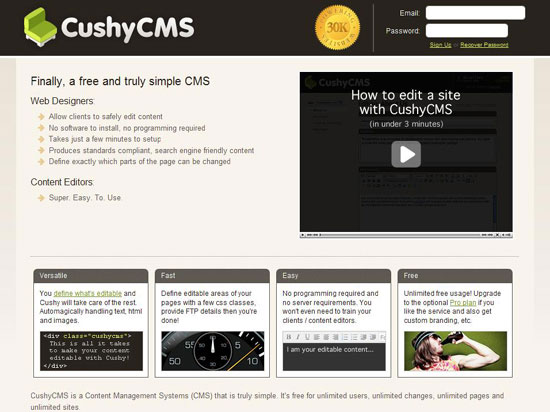
Cushy CMS is a hosted and free content management system that’s lightweight, though powerful enough to jumpstart your site in a jiffy. With Cushy CMS, you have to add CSS styles to the sections that you will eventually change or edit. This CMS allows you to access and store content while it uploads this same data to server.
Cushy was built for content editors and designers and so it’s very simple and easy to manage. Being a SaaS, you don’t need to install or self-maintain the CMS.

TYPOlight

TYPOlight
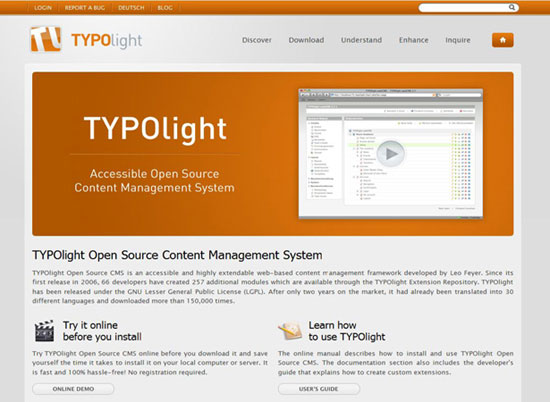
TYPOlight is great for site builders that will be maintaining multiple sites and is an ideal solution for web developers. If you’re thinking about creating a simple or advanced site design with great functionality, then TYPOlight CMS can definitely get the job done for you.

RadiantCMS

RadiantCMS
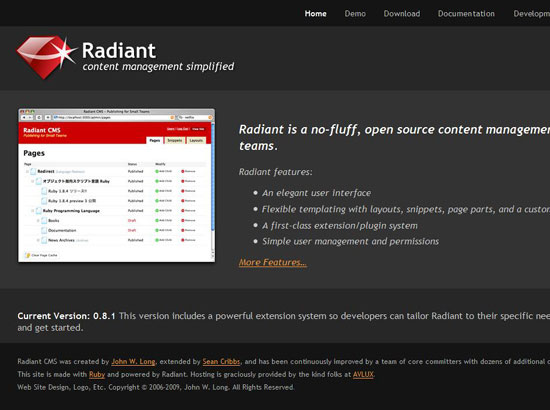
RadiantCMS is a Ruby on Rails app. Radiant has a very active community for core support and updates. If you are a RoR developer, it’s right up your alley. Radiant has concentrated on making things much more user-friendly for end users and web designers. RadiantCMS also contains an innovative custom tagging language (called Radius) that’s easy to pick up.

SilverStripe

SilverStripe
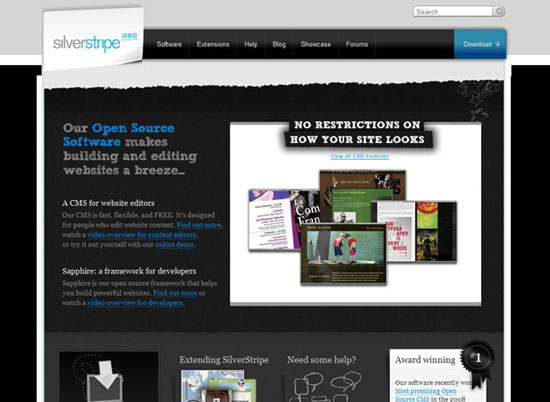
SilverStripe is an open source application written on top of PHP and was designed with emphasis on flexibility. SilverStripe has many configurable options and is geared towards content-heavy websites.
This CMS was completely built on its own PHP framework, called Saphire. SS offers content version control and great SEO support. All users alike are welcome to customize the administration area for their clients or themselves.
The only downside with SS is that the default templates are garbage; however, that’s nothing a little elbow grease wouldn’t fix.

Textpattern CMS

Textpattern CMS
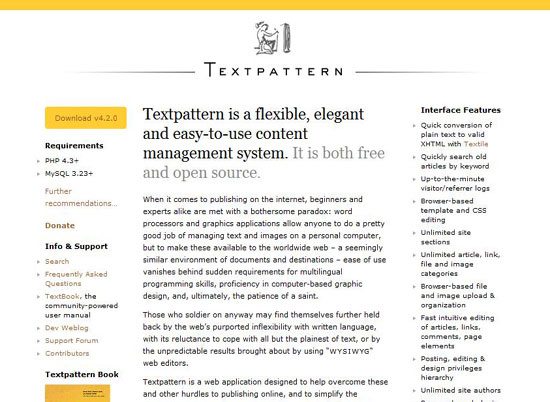
Textpattern CMS is a very popular system for many designers due to its simplicity.
Textpattern strives to provide great content management that produces quick, easy, and desirable web standards-compliant pages. There is no WYSIWYG editor because Textpattern utilizes textile markup for content generation.
The backend is very easy to use and follow. New users will learn the administration section with super speedy ease.

Alfresco

Alfresco
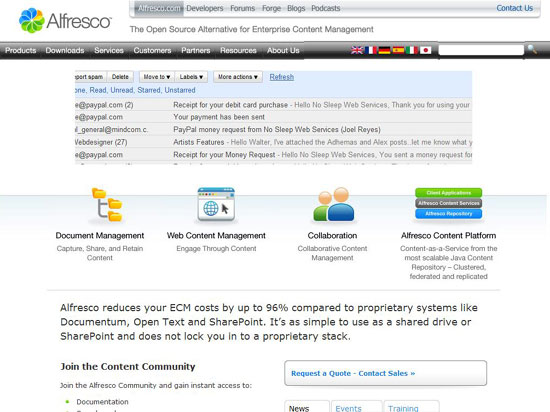
Alfresco is a JSP enterprise content management solution that’s quick and easy to install. Alfresco lets you drop files into folders and convert those files into interactive web documents. This CMS isn’t as easy to become familiar with when compared to others, however, with a little bit of time investment, you’ll definitely get the hang of it. Alfresco could be targeted more towards the intermediate developer, although its pure functionality allows it to become very usable. The administration GUI is very organized, well maintained, and easy to navigate through.
Got tips on how to evaluate the right CMS? Do you have experiences (good or bad) with the content management systems shown here? Talk to us about it in the comments.

Designing Hyperlinks: Tips and Best Practices


Designing Hyperlinks: Tips and Best Practices
A hyperlink (aka link) is the most basic interface on websites. In fact, we can trace hyperlinks back to the origins of the web, with Tim Berners-Lee’s ENQUIRE, where each new page had to link to another. 
This article is a discussion on designing hyperlinks, offering a few tips and best practices for designing them. We will conclude with a small showcase of exceptional hyperlink designs on live sites.

Why Is Hyperlink Design So Important?

Links are the most basic interactive component between a user and a web page: A user clicks on a link, and in turn, they are presented with another web page. They’re so important, yet easily get lost in the midst of newer and shinier UI elements like web forms, animated tooltips, and call-to-action buttons (which are essentially links styled to look like something else). Links are so ubiquitous that we often overlook them in our designs.

Basic Principles of Designing Hyperlinks

Before we go any further, it might be wise to cover basic things you should know about hyperlinks.

Hyperlink States

When conceptualizing link designs, it’s important to consider and know the link states you have to work with. There are 5 states that <a> elements can have:
  • a:link – this is the normal state of a hyperlink
  • a:visited – this is when the link has been visited before
  • a:hover – this is when the user hovers their mouse over a link
  • a:active – this is when the user clicks on the link (or presses the Enter key on a focused link)
  • a:focus – this is when the user uses the Tab key to navigate to hyperlinks
The technical term for these states is pseudo-classes. It’s important to note that web browsers treat these states differently by default. For example, in Firefox, :activeand :focus are displayed with a dashed gray border around them, controlled with theoutline property. Whereas, in Google Chrome (and other WebKit browsers), :activelinks will have no style and :focus links will have a yellow border around them by default.
Here are examples of each link state (shown in Google Chrome 6.0):
Links in Google Chrome
It’s best to have a style for each state so that the user is aware of the status of each hyperlink on a web page. For example, hovering over a link and having it look a different way (e.g. changing its color) improves the perception that it can be clicked.

Popular CSS Properties for Styling Hyperlinks

There are many link style properties you can take advantage of for designing hyperlinks. Some popular CSS properties pertaining to the visual appearance of links include:
  • color – The color of the hyperlink
  • text-decoration – Setting this to none removes the default underline
  • background-color – If used in the :hover state, can make the link’s background color change
  • outline – Setting this to none using the a:focused selector removes the default gray border around active and focused links in Mozilla and the yellow or blue border in WebKit (Chrome and Safari); this is not advised because the border helps with web accessibility
  • font-weight – Another distinguishing method for hyperlinks is setting them to bold
  • border – If you need more control outside of text-decoration: underline, try giving your hyperlinks a bottom border (experiment with thickness, color and style)
There are plenty more of CSS properties you can tweak, but the above seems to be the most common.
Below, you can see different styles of hyperlinks on Flickr. The text "Your Photostream" changes background-color when you hover over it. The main menu links are styled as bolded and without underlines. The "Recent Activity" link looks the most like the standard blue, underlined hyperlink.

Hyperlink Design Best Practices

Here are a handful of suggestions and commonly held best practices when dealing with the style and design of hyperlinks.

Keeping Link Styles Simple Isn’t a Bad Thing

I think we can all still relate to seeing the standard blue, underlined hyperlink. It’s the default style of hyperlinks and they work well.
Good hyperlinks should be distinctive from other types of text in a web page. According to several findings by usability researcher Dr. Nielsen, hyperlinks are most effective when they are a different color from other types of text in a web page and when they are underlined to denote that the text is clickable. Nielsen also suggests that the color of unvisited links should be "vivid, bright, and saturated." It goes without saying that the converse of these ideas are also true. It’s best to avoid underlining text for things other than links, and not using normal text that is the same color as your links.

Style Link States Differently

Earlier on, we talked about the 5 different link states. To avoid confusing your users and to speed up visual recognition of hyperlinks on a web page, it’s best to provide different styles for each link state.

Don’t Remove Outlines on Active and Focused Links

By default, most browsers will style hyperlinks when they are clicked or focused on. For example, in Firefox 3.6, the default style for a:active is coloring the link red and surrounding it with a red dashed outline. The default style for a:focus, which you can see for yourself by using your Tab key, is a blue dashed outline.
Don't Remove Outlines on Active and Focused Links
Both of these visual elements are used to aid in accessibility. People who cannot use a mouse need to tab to hyperlinks in order to activate them (using the Enter/Return key). Imagine having to tab through 100 links in a web page. Would it not be difficult to see which link you are on if there was no visual cue for them?
The same is true for active links; a different style gives users the visual feedback that they were able to successfully click on the link.

Keep Hyperlinks Consistent

Many principles of usability and psychology support the notion that things that are similar in function should look the same. For example, Gestalt psychology — which applies to human perceptions of design — suggests the concept of similarity; that is, "[w]e group things perceptually if they appear similar to one another."
To avoid the situation where users having to think whether a particular text is a link or not, it is a good idea to keep hyperlinks and regular text styled consistently.

Reserve Common Hyperlink Styles for Hyperlinks

The accepted and most recognizable convention for hyperlinks is that it is blue and underlined. Therefore, to avoid confusion, you should avoid coloring your normal text as blue and underlined.

Showcase of Hyperlink Designs

Here are a few great hyperlink designs to take a look at. I hope that these can inspire you to rethink the significance and possibilities of your own hyperlink designs.

Web Designer Wall

Web Designer Wall
Web Designer Wall is a popular design blog created by Nick La. The site’s hover effects for links on the site’s sidebar feature a pencil-style circle around the text. It’s unique and adds an additional level of intricacy to the entire site design. La even offers a tutorial on how you can recreate a similar effect. You can also notice some creative hover effects on links in the navigation and blog posts.

Carsonified

Carsonified
Carsonified connects web designers and developers together through conferences held year-round all around the world. Their website is an excellent display of consistency and similarity principles applied to links. You can move your mouse all throughout the page and see their unique hyperlink effects displayed in a similar fashion as their site logo. The most prominent area would be the top navigation menu that boasts an icon set for each link.

Far Coast

Far Coast
Far Coast has their entire website designed in Flash. After the initial page load, you’ll notice all of their links perform a fade-in effect when moused over. This visual reaction to mouse hovers gives users the idea that link elements are interactive, which is in line with the best practice of styling different link states to provide the perception of clickability.

WordPress.org

WordPress.org
You can see consistency of hyperlinks applied everywhere throughout the official WordPress site. Their main menu links look great and use CSS3 text-shadow to give them that extra touch of detail. The main menu links also have descriptive titleattributes to help users learn more about a particular link when they hover their mouse over them.

Retinart

Retinart
Retinart is a freeform blog containing creative thoughts on graphic design and digital art. The design boasts an interesting hyperlink hover effect that reflects the background and text color over each other — a classic technique that works really well on this particular blog design especially because of the limited color scheme. This helps achieve an even stronger visual grouping of links as well.

Unmatchedstyle

Unmatchedstyle
This web design gallery is just one of many that you can find all over the web. The site’s simple design and impressive layout allows for easy browsing through their collection. An element of interest would be the navigation links toward the top of the page that display a creative underlined effect on mouseover.

made my day

made my day
This is the personal blog of web designer Marc Hinse. His page boasts a number of interesting hyperlink effects, all of which seem perfectly placed. Check them out and notice how the hyperlink states fit into the blog’s overall design theme.

Build Conference

Build Conference
The Build Conference is held for designers and developers and is hosted in Ireland. Their site has a unique effect added to their main navigation links that fades in on mouseover using CSS3 transition properties.

LogoPond

LogoPond
The gleaming fountain of all logo and branding inspiration, LogoPond has some great link styles. The most notable are in the footer area where you can discover links to popular pages throughout the site. On hover, you get a flipped background and text effect similar to the Retinart blog.

Suikerdraakje

Suikerdraakje
Suikerdraakje is an e-commerce store selling baby supplies and toys. Their design is remarkable and features many illustrations to fill out whitespaces in the layout. Their main navigation links display a rounded corner background shift on mouse over — one of the few sites to display this effect.

Nintendo

Nintendo
Nintendo has always been at the forefront of innovation, and you can see this on their corporate site. In the context of hyperlinks, their main navigation links fade into a light blue glow underneath when you mouse over them, reminiscent of the blue LEDs on the Wii.

Stephen Caver Blog

Stephen Caver Blog
Stephen Caver’s blog theme is very impressive and makes good use of hyperlink design and best practices. When you move your cursor over his blog posts, you’ll notice the links in each area will light up. This technique is simple to implement with a small bit of JavaScript and adds the interactivity your users may appreciate.

MapBox

MapBox
MapBox is a newer web application that boasts a handsome "Web 2.0" design. You can see some very neat effects all throughout the site, most notably their heading links that hold a nice hover effect.

Dribbble

Dribbble
With Dribbble being a site targeted towards designers, it would only make sense that their site design should be remarkable. Their hyperlinks display so many unique and customized effects all around the design layout that it’s hard to pinpoint one area to concentrate on.

G4TV

G4TV
G4TV is the cutting edge of video game and technology news. The site has a diverse design containing many unique hyperlink design states. Check out their main navigation and sidebar content specifically.

22 Excellent Tips for New Drupal Developers


Introduction
Introduction
Another place to find help is in the Drupal Forums; search for the specific answer to your specific question. Here are some tips for posting to the Drupal forums.
While Drupal is not for everyone, it is a popular platform that helps accomplish many common goals for website owners.

1. Install Drupal Quickly Using Profiles

Drupal comes in the "core" format as a standard download from the official Drupal.org website (click the "Download" button on the Download page at Drupal.org for the most recent version).
However, if you have a specific need, say a news site, or a political campaign site, consider using one of the contributed profiles or distributions that have been built off thousands of hours of development time from other coders. These pre-configured bundles have certain modules, themes, or pre-built functions that allow you to get your ideal site up and running, instead of you having to physically download and configure multiple modules to extend Drupal core.
Install Drupal Quickly Using Profiles
I use the Acquia distribution, which comes with many modules for a complex site with moderate to high functionality.

2. User #1 is Important

Take good care to record the username, password, and e-mail address of the first user (typically the username will be admin). This is user number 1 — the owner of the site — and you’ll periodically return and log in as this first user to keep the site up-to-date. It’s also important to secure this account because it holds a lot of power over your Drupal installation.

3. Know the Basic URL Structure for Drupal Content

Once you have a basic installation in place, you may create new content by navigating directly to this URL (where example.com is your domain name):
http://example.com/node/add
Content within a Drupal site are called nodes. A node may be an image, a page, a story, an announcement, a poll, a web form, or a job listing — you can think of a node as a single unit of content. For example, if you want to create a new page, you can go to the following URL:
http://example.com/node/add/page
Know the Basic URL Structure for Drupal Content
Once you create content, you can find its nid (node ID), which is a unique identifier for that node, in the URL. To determine the nid through the URL of a web page, just use the following URL structure as a guide, where [nid] is the node ID of that page:
http://example.com/node/[nid]
In the following image, the nid is 2.

4. Google Is Your Friend

Right from the beginning, you may have installation errors, mostly because your local development environment, i.e. your installation of Drupal in your computer, may be different from your remote hosting environment, i.e. where your Drupal site will be hosted.
Whenever you encounter a Drupal issue, Google is your friend. Copy and paste the exact error message, and consider putting the search term inside double quotes so that Google does a literal search.

5. Customize Your Site’s Error Pages

The default error messages Drupal gives your users when they navigate to a web page that they don’t have permission to view or a page that is not found can be intimidating and not really useful. Configure the language of your 403 Access Denied and 404 Page through this URL:
http://example.com/admin/settings/error-reporting

6. How to Troubleshoot the "White Screen of Death"

When you navigate to your Drupal site and you see nothing but a white blank screen, playfully nicknamed white screen of death (probably as a reference to Microsoft Windows’s blue screen of death), it typically means that Drupal encountered a PHP error. Many things can cause this, and it usually has to do with a development error. Even a missing semicolon can trigger the white screen of death.
If you find yourself with a completely white screen (blank), you’ll want to enable PHP error reporting so you can find where the issue is being encountered. For more information, read this Drupal.org tutorial called White Screen of Death.

7. Install the Administrator Menu Module

If you didn’t use an installation profile and you aren’t using Drupal 7, install theAdministration menu module (admin_menu).
Install the Administrator Menu Module
It’s is a dropdown menu at the very top of the administration pages that links to admin pages, making it easier to find your way through the maze-like administration pages.

8. Back Up Your Database in a Safe Location

The Backup and Migrate module is perfect for grabbing an SQL dump of your database for storage or if you need to move it from one host to another. I recommend storing these backups on a separate location of your site. For small sites, you can even get away with emailing the SQL file to yourself and storing it there. Not recommended for security purposes (since if your email account is compromised, then your site’s content will be exposed), but it just illustrates the types of places you can store your SQL files.

9. When Something Goes Wrong, Flush Your Cache

Drupal creates caches of your content so that every time a page is requested, it doesn’t have to generate it dynamically all of the time, reducing the amount of PHP processes and SQL queries being made, which in turn increases the performance of your Drupal site.
However, if your site acts strangely or you can’t see your theme edits during development, use the Flush Cache function. Flushing your cache clears out your Drupal cache and allows the site to rebuild itself with up-to-date information.
When Something Goes Wrong, Flush Your Cache
The Drupal cache can also be disabled temporarily while you’re still in development under the Site Configuration page, under Performance.

10. Explain the Concept of Content Types to Clients

One of the biggest challenges for your client is to understand the different types of content on their site. From the perspective of the end-user, a page of staff biographies, or a page of announcements, or a page of recent events all behave the same, so it might be difficult, for example, to explain why a Story is different from a Page.
But in order for end-users to really use their system properly, this conversation needs to happen at hand-off.
One thing to note is that they can create new types of content by going to Administer > Content types > Add content type (tab).
From Drupal’s point of view, breaking down the site into unique content types, the site owner can easily make cascading changes for one content type. You could, for example, change commenting settings for a Page that would be different for a Story.
Each of the different nodes within a specific content type may then be displayed on the front-facing sections of the Drupal site using Views (more on this later).
By understanding what kinds of content will be used on the site, you can create "content types" to match. When you do the initial discovery phase with your client, help them break down all the content they want on their site into specific "content types."
Explain the Concept of Content Types to Clients

11. Understand User Roles and Permissions

Once you have a grasp of all the modules you’ll be using, as well as the content types, then you may specify what types of users ("roles") you’ll have on the site and which permissions those roles have.
Understand User Roles and Permissions
You can configure user permissions via:
http://example.com/admin/user/permissions
The default Drupal user roles are as follows:
  • anonymous user – a user that is not logged in
  • authenticated user – a user that is logged in and has an account on your Drupal site
  • admin user – a user that is logged in, has an account on your Drupal site, and has rights to administer the website

12. Understand Basic Theme Development Concepts

There are hundreds of themes available for free download, paid download, or for unique customization from a design comp created by your web designer. If I’m doing a custom theme, I usually use a modified version of the Framework Theme as a base, with all additional graphic design elements (PNGs, backgrounds, icons, photos and logos) coming from Photoshop and with CSS edits directly to the stylesheet.
A theme is made up of these major parts:
  • *.info – has information about the different regions of the page; consider adding new sections such as a "Content Top" section or a "Bottom Footer" section if needed
  • page.tpl.php – the default template for pages
  • node.tpl.php – the default template for how a specific node will display; custom nodes can be created by creating a file using the following naming convention:node-[nodename].tpl.php (e.g. node-blog.tpl.php or node-product.tpl.php)
  • template.php – pulls the layout together and calls different functions into the overall layout of each page
  • style.css – all custom CSS for the site
There may be some additional *.php files such as block.php and/or comment.php if you or the theme designer decide to specify the layout of those elements.

13. Know Some Places for Getting Free Themes

Sometimes your client will be able to find a theme that fits most of their needs, and you can do additional customizations to the CSS. If they would like to download public themes, I typically encourage clients to visit the following links.

Free Themes:

Premium Themes:

14. How to Install a Downloaded Theme

To enable a downloaded theme, first move the unpacked file into a new directory:
/sites/all/themes/[themedirectoryname]
How to Install a Downloaded Theme
Next, choose your theme from Administer > Site Building > Themes or by navigating directly to this URL:
http://example.com/admin/build/themes/select
Choose which theme you would like as the Default and which ones you would like to have Enabled. If a theme is Enabled, it means it can be set as the Default.

15. Don’t Forget to Set Up Basic Site Information

Some standard information gets collected and displayed on your basic Drupal setup, such as the name of the website, the e-mail address for any system messages, the slogan, mission statement, and text in the footer message.
Don't Forget to Set Up Basic Site Information
This information can then be called using the Drupal API in case you need to print them out on certain Drupal pages.
You can set and view these through Admin > Site configuration > Site information or by navigating directly to this URL:
http://example.com/admin/settings/site-information

16. Always Set Up Clean URLs

Drupal, by default, uses unfriendly system URLs to refer to your web pages. For example, navigating to a page may look like this: http://example.com/?q=node/1. Not very user-friendly or indicative of what the content is. It is also not very good for SEO.
To solve this issue, enable Clean URLs by going to Administer > Site configuration > Clean URLs or navigating directly to the following URL:
http://example.com/admin/settings/clean-urls
Always Set Up Clean URLs

17. Install a WYSIWYG Module

Your clients will demand an interface that allows them to compose their content easily and without knowledge of coding. Creating content should be as easy as writing and sending an email. There should be a GUI for doing things like bolding, italicizing, underlining text, creating bulleted lists, creating hyperlinked text, and so forth. I’m recommending the CKEditor module for handling WYSIWYG functionality. It is the successor of the popular FCKEditor. Try out the demo and read the project’s documentation for more info.
Install a WYSIWYG Module
CKEditor comes in two parts:
  1. A "wrapper" module: CKEditor for Drupal
  2. The main required component, which you can download directly from the CKEditor website

18. Deploy with a Contact Form

Most of our clients require some sort of web form, and it’s usually going to be a contact form for their site users to be able to message them. Drupal core has a pre-built contact form, and it’s best to enable it and make necessary changes to it prior to deploying the Drupal site.
First, you must enable the Contact module, which is an optional core module. Then, to configure the contact form, go to Administer > Site Building > Contact Form or navigate directly to:
http://example.com/admin/build/contact
Notice in the image above that you may edit many parts of the contact form, such as the different types of contact form categories available and different addresses to send a message, depending on its category. This could be very useful for multi-user sites, where you can have a category regarding advertising forwarded to the sales team and a question about technical support forwarded to the IT guys.

19. Manage Your Navigation Menus

Drupal comes pre-configured with three menu blocks:
  1. Navigation links – provided by Drupal and the main interactive menu with personalized links
  2. Primary links – major sections of the site, typically like the tabs across the top of the page
  3. Secondary links – an additional set of links for items like legal notices, contact details and other less-important navigational elements
You may manually edit these menus by using your Menu manager via Administer > Site building > Menus > List menus or navigating directly to:
http://example.com/admin/build/menu/list
Alternatively, you can add a new node, and from the data entry page, you may add that new node directly to the menu: just specify the desired menu and the text to appear within that menu.
Manage Your Navigation Menus

20. Learn to Love Views

Using Views gives you a terrific amount of control over the tedious task of creating displays of your information. Using the Views editor, you can filter your available nodes and publish them in various styles such as tables, grids, or lists, and sort them in the manner of your choosing.
For example, from a content type of "people", you can use Views to specify any of the following from the same set of records:
  • A grid of faces that is an additional "block" to be placed on a Team page
  • An alphabetical list by name and department on a Departments page
  • An office-only list of e-mails and phone numbers on an Administration page
Learn to Love Views
I recommend reading this tutorial called A Beginners Guide to Using Views. Also, theGetting Started with Drupal: A Comprehensive Hands-On Guide walks you through the creation of a view.

21. Partner with a Hosting Provider You Trust

Obviously, if your hosting provider does not have experience or a reputation in hosting Drupal, consider switching to a host with excellent tech support and a responsive team that understands your concerns, as well as those of your clients.
I use Nexcess for all of our Drupal sites — their control panel is easy to use, they’re knowledgeable, their tech support team responds quickly, and they are set up to grow along with you.

22. Create a Checklist for Launch

After you’ve configured your modules and fine-tuned your chosen theme, finished your data entry and user testing for quality assurance, it’s time to soft-launch the website.
Here is my final checklist of items to review prior to the launch.

Cron job

Ask your hosting provider to help you set up a cron job. They will direct you either to a back-end manager or they will walk you through the process. Drupal’s default cron script is located at /cron.php.

Rewriting htaccess

Specify if your site will be something like this: www.example.com or something like this: example.com. These are considered different "entities" by search engines and the process of creating a main (canonical) URL is an ongoing challenge.

Setting the base URL

If, after you rewrite htaccess, you find yourself still having issues, review the site’s base URL. Seek this line in settings.php:
# $base_url = 'http://www.example.com'; // NO trailing slash!
And change the $base_url variable assignment to your own website.

Performance caching

Once live, your website may benefit from caching to improve page response times. Use the caching function to help reduce calls to the database with every single user, on every single page. If you turned it off during development, turn it on again by going to Admin > Site configuration > Performance or navigating directly to:
http://example.com/admin/settings/performance

Conclusion

There is a lot of ground to cover when you’re first getting accustomed to using Drupal. Find the types of functions that most match what your clients ask for, and then find a set of well-supported modules (multiple downloads, responsive maintainer) to use in your toolkit for deploying content management systems.