I recently made the switch from another (several) code editors to PhpStorm
based on the recommendations of several members of the Drupal community
- not to mention all the postive things I've heard about it on IRC and
various other places.
My main motivation for making the switch was the ability to have a integrated debugger - both when running Drupal in a web browser and via Drush. While there are plenty of resources online demonstrating how to set up the debugger, I found that I needed to do a combination of things to make it happen
To make it work from the command line (Drush), I also had to add this stuff to another php.ini file. I figured out which one by doing a
If you're using another command line interface, you'll need to make a similar addition. Be sure to
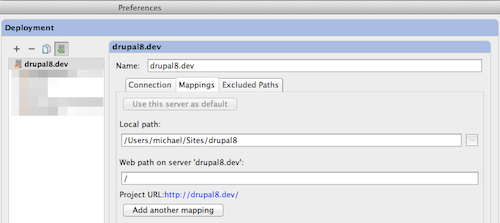
The deployment server mappings were left at their default values:
and happily debug away. If it doesn't work, here are a couple of things you can take a look at:
My main motivation for making the switch was the ability to have a integrated debugger - both when running Drupal in a web browser and via Drush. While there are plenty of resources online demonstrating how to set up the debugger, I found that I needed to do a combination of things to make it happen
Enable xDebug
Depending on your *AMP stack, xDebug may or may not be enabled by default. I use MAMP Pro, and it wasn't. It was easy enough to enable - I added the following to my php.ini file (note that the path will be dependent on the version of PHP you'd like to use):[xdebug]
zend_extension="/Applications/MAMP/bin/php/php5.4.4/lib/php/extensions/no-debug-non-zts-20100525/xdebug.so"
xdebug.profiler_enable = 0
xdebug.profiler_output_dir = "/tmp"
xdebug.remote_enable=1
xdebug.remote_host=localhost
xdebug.remote_port=9000
xdebug.remote_handler=dbgp
xdebug.max_nesting_level=500
xdebug.idekey=PHPSTORMTo make it work from the command line (Drush), I also had to add this stuff to another php.ini file. I figured out which one by doing a
drush status and seeing which PHP configuration it was using. Here's some documentation demonstrating how to confirm you're good-to-go.Update .bash_profile
If you want to be able to debug Drush commands, you'll need to add the following to your .bash_profile:export XDEBUG_CONFIG="idekey=PHPSTORM"If you're using another command line interface, you'll need to make a similar addition. Be sure to
source ~/.bash_profile after you make the change (or restart your terminal session). See Angus Max's post on Lullabot.com for more details.Configure PhpStorm
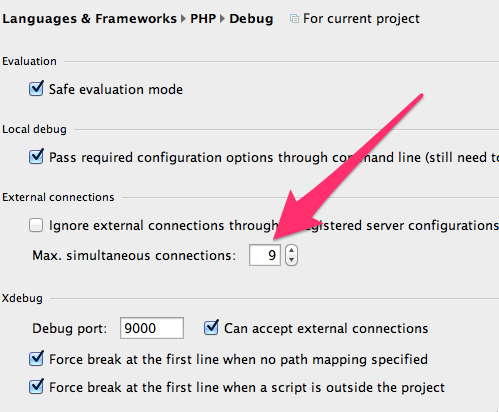
JetBrains (the makers behind PhpStorm) provide decent online documentation - I found this post and this screencast especially helpful. For my situation, where I wanted to debug a local site, the following settings are key:Max. Simultaneous Connections
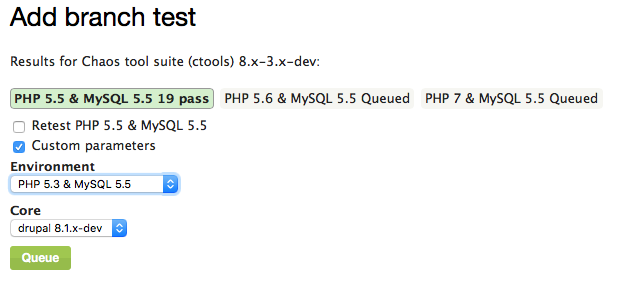
When debugging automated tests using the run-tests.sh script, it is crucial that PhpStorm's "Max Simultaneous Connections" for PHP Debugging is set to a sufficiently large value. "9" works for me.Setting up a deployment server
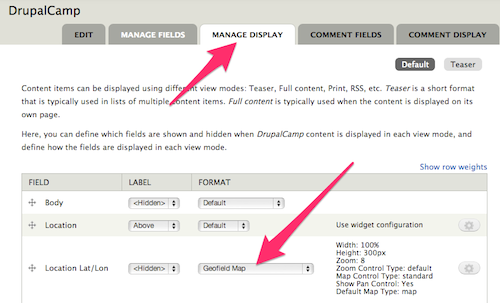
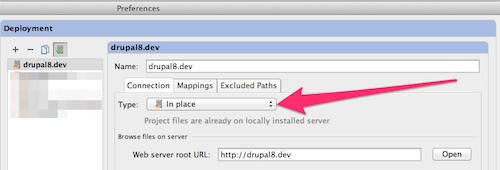
Configuring a deployment server is one of the key things you need to do in order to debug in PhpStorm. While PhpStorm supports remote debugging, for my situation, the "In place" deployment type was sufficient.The deployment server mappings were left at their default values:
Troubleshooting
At this point, you should be able to enable the PhpStorm debugging listener, go into your browser, turn debugging on (either via a browser extension or bookmarkletand happily debug away. If it doesn't work, here are a couple of things you can take a look at:
- Case-senstitivity in paths - on my machine, the path to my "Sites" directory is "/Users/michael/Sites". I had an issue where breakpoints weren't working that I tracked down to a lower case "s" in "Sites" that I mistakenly set up in my Apahce virtual host for the site ("/Users/michael/sites" instead of "/Users/michael/Sites").
- xdebug version - some versions of xdebug are better than others. Several months ago I had an issue with xdebug not working properly when debugging from the commandline (Drush). I tracked it down to an old, buggy version of xdebug. I updated xdebug and all was well.
- Some people use PhpStorm "configurations" to configure debugging, while this works fine, it isn't necessary. I have zero "configurations" configured on my machine.
- Debugging from Drush - be sure to set your PHP_ID_CONFIG value to same value as your PhpStorm project "server".
- Do you use Acquia Dev Desktop?